Are you tired of tripping over tools and materials in your small garage? Designing a safe workshop layout can feel overwhelming, but it doesn’t have to be. Start by tackling the mess—clear out the clutter and take accurate measurements of your space. This sets the stage for everything else.
Next, think about safety. You want to keep walkways clear so you won’t trip over anything while you’re working on a project. Make sure to store hazardous materials in a safe place, out of reach and away from sunlight.
Designating specific zones for tool storage, work areas, and material handling is key.
Now, let’s talk about the lighting. Good lighting can make a huge difference in your workspace. It’s not just about being able to see but also about enhancing safety.
You might also want to consider dust control strategies to keep things clean. The best part is that these small adjustments can significantly improve your overall workshop experience.
So, why does this matter? A well-organized and safe workshop not only boosts your productivity but also reduces the risk of accidents. Take these steps seriously, and you’ll create an environment where you can focus on your projects without the mess and chaos.
In summary, clear the clutter, prioritize safety, and set up specific areas for different tasks to make the most of your garage workshop. What do you think your next steps will be in tackling your workshop layout?
Key Takeaways
- Clear clutter and measure garage dimensions to effectively designate zones for tools, workspace, and material handling.
- Place heavy tools on lower shelves to ensure safe access and avoid injury from lifting.
- Use LED lighting to enhance visibility and eliminate shadows above key work areas and tools.
- Implement a dust collection system to efficiently remove debris and maintain a clean working environment.
- Keep walkways clear and regularly assess the workspace to minimize hazards and maintain organization.
Begin Your Workshop Setup: Space Assessment and Planning

Need some space for your next big project? If you’re like many DIY enthusiasts, it might be time to assess your garage setup before diving into the workshop setup. Start by clearing out the clutter. Once you can actually see your space, it’s a whole lot easier to figure out what you have to work with.
Next, make sure to measure those garage dimensions. Creating a detailed layout may seem like a chore, but trust me, it’ll save you a ton of headaches later on. Think about your workflow too. You wouldn’t want to be running back and forth across the garage every five minutes. For example, placing your table saw near the garage door means you won’t just enjoy easy access, but it’ll also make dust management a breeze.
Now, where to store everything? It’s a good idea to designate specific zones for tool storage, your main project workspace, and material handling. This way, you know exactly where everything should go. If you need a bit of inspiration, try picturing how you want it all to flow together.
And don’t forget the importance of maintaining that organized vibe! Regularly check in on your setup and be open to tweaking things as you work on new projects. Honestly, keeping a workspace flexible can really help you tackle whatever comes next.
Also, investing in high-quality tool pouches can enhance your organization and keep your tools readily accessible.
How’s your garage looking? A little prep can go a long way in setting yourself up for success!
Recommended Products

Specification: Garage storage system includes corner wall cabinet x 1, corner base cabinet x 1, wall cabinet x 2; 1-drawer cabinet x 2; 4-drawer cabinet x 1; workbench x 3, pegboard x 4. Item Weight: 302 lbs; Package Size: 55.1 x 36.2 x 75.6 in; Item Size: See Pictures; Item Color: Black and Grey The size of garage storage cabinet set are 130"L x19"Dx 76"H inches. Garage storage cabinets system includes Locker x2, Wall cabinet x2, 1-drawer roller cabinet x2, 4-drawer roller cabinet x1, 71 in workbench x1, Pegboard x10, Shelf to connect the wall cabinets x4.For stability, high cabinets can optionally be fixed to the wall. Overall weight capability 820 LBS.

Effortless & Efficient Sweeping: This battery-powered sweeper dramatically reduces operator fatigue and increases productivity, with a battery-operated main broom, side brushes, and dust fan

Reinforced Structure: Built to last, the system features heavy-duty metal cabinets made from 100% cold-rolled steel for superior strength and durability, complemented by secure furniture locks
Prioritize Safety: Managing Hazards and Emergency Readiness

Let’s face it—working in a cluttered space can be a total buzzkill. It’s not just about getting stuff done; it’s about keeping yourself safe while you’re at it. Start by clearing those walkways in your garage workshop. You don’t want to trip over tools or materials while you’re focused on a project. Make sure you can move around freely without dodging obstacles.
When it comes to hazardous materials, don’t treat them lightly. Keep them in designated fireproof cabinets, and don’t forget to label everything clearly. That way, there’s no guesswork when you’re reaching for something—safety first, right? Also, having at least one fire extinguisher nearby is a must. Check it regularly to make sure it’s functioning properly and easy to grab in case of an emergency.
Good ventilation is something you might overlook until it’s too late. Using vent fans or fume extraction systems can greatly reduce the build-up of fumes and dust, making your workspace much healthier. So, don’t forget to think about the air you’re breathing while you work.
Now, let’s talk tools. Familiarize yourself with their safety features. Honestly, knowing how to use your gear safely can prevent so many accidents. Keep your safety gear—like goggles and gloves—within reach. You never know when you might need them.
To wrap it up, maintaining a safe workspace is just as essential as being productive. Are you ready to take these steps to create a safer environment for yourself? Remember to ensure your hazardous materials are securely stored in cabinets that comply with OSHA and NFPA regulations to maximize safety.
Top Essential Tools for Your Garage Workshop

Setting up a garage workshop can be a bit overwhelming, especially when it comes to figuring out which tools are truly necessary. Ever find yourself staring at a heap of gadgets, wondering where to begin? A solid selection of essential tools can really make a difference in how smoothly your projects go.
First off, you definitely want a circular saw. It’s perfect for those quick, straight cuts in wood and plywood. Think about how often you’ll be making those cuts – trust me, having this tool on hand will save you a ton of time. Alongside that, a reliable drill/driver is a must-have. It’s not just for drilling holes; you’ll find it invaluable for driving screws when assembling everything from furniture to outdoor projects.
Now, what’s a workshop without a sturdy workbench? This isn’t just for show. A good workbench offers a stable surface for measuring and cutting, and it can really help keep your workspace organized. When you’re in the middle of a project, the last thing you want is a cluttered area slowing you down.
Let’s talk about precision for a second. If you’re diving into more detailed projects, investing in a quality miter saw is a great idea. It’s fantastic for those precise angled cuts that can elevate your work from basic to professional-looking. Plus, you’ll be amazed at how much easier and cleaner it makes those tricky cuts.
And don’t forget about hand tools! An extensive set that includes hammers, wrenches, and screwdrivers is essential. These tools are the backbone of any garage workshop. You need them for a variety of tasks, and honestly, they’re sometimes just easier to grab than wrestling with power tools.
For safety and ease of use, consider incorporating tools with ergonomic designs to reduce strain and improve comfort during your projects.
Recommended Products
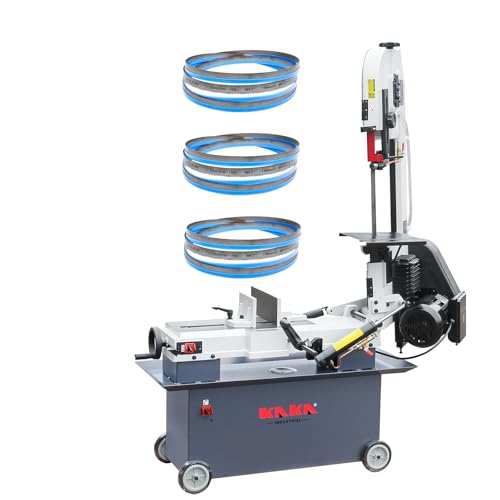
Powerful 1.5HP Motor & Dual Voltage Powerful 1.5HP Motor & 3 Included BladesEngineered for heavy-duty cutting of structural steel, pipe, and alloy tubing. Includes 3 bi-metal blades (5/8TPI) optimized for thin-walled materials, thick solid bars, and mixed-density metals—reduce downtime with instant blade swaps.

Powerful Dual Voltage Motor-Equipped with a 1.5HP motor supporting 115V/230V dual voltage, providing flexibility for workshop or industrial use. Handles tough materials like steel pipes, aluminum, and structural metals with consistent performance

Powerful 15 AMP motor delivers 2,300 RPM for enough power to cut through pressure treated lumber
Designing Functional Zones for Different Tasks
When it comes to setting up your garage workshop, figuring out how to make the best use of the space can be a real challenge. Have you ever tried to work in a cluttered area? It can be frustrating! That’s why it’s important to think about organizing your workshop into separate functional zones tailored for specific tasks.
Start with a cutting station right in the center of your workspace. Position your table saw there for easy access. Surround it with some safety measures to keep your workspace secure. It’s comforting to know you’re working in a safe environment, right?
Next, think about creating a dedicated assembly area next to your workbench. This way, all your tools and materials will be within reach, making your workflow much smoother. To keep everything organized, it’s a good idea to install some storage bins and pegboards on the walls for your tools. This helps cut down on clutter and makes it easier to find what you need.
Finally, don’t forget to leave clear walkways between each zone. You really want to enhance safety and allow for easy movement while you’re busy working. Honestly, a well-planned layout can really improve how efficiently you get things done.
Also, investing in a durable tool backpack can help you keep your tools organized and portable within your workshop.
In short, organizing your garage into functional zones can make a world of difference. So, as you plan your workshop, think about how to tailor each area to your needs! Are you ready to put these ideas into action?
Effective Lighting Solutions for Improved Visibility
Ever tried working in a dimly lit garage? Frustrating, right? It’s tough to focus on your project when shadows play tricks on you. That’s why getting your lighting right is so important.
First off, consider LED lighting. Unlike those old fluorescent bulbs, LEDs use about 30% less energy and bring a brightness that’s hard to beat. As you plan your space, think about placing multiple fixtures right above your workbench and around any big tools you rely on. This helps eliminate those pesky shadows that hide what you really need to see.
Task lighting will also be your best friend. Adjustable lamps, like gooseneck ones, let you shine light right where it’s most needed, whether you’re tightening a bolt or doing some detailed work.
And let’s talk durability. Go for unbreakable LED bulbs—these babies can last around 94,000 hours! Imagine how much hassle you’ll save by not having to replace light bulbs all the time.
Whenever you can, take advantage of natural light too. Keep those windows clear so your garage can soak up daylight. It brightens the space and gives you a nice boost while you work.
For added flexibility and convenience, consider supplementing your setup with a rechargeable flashlight that offers multiple brightness modes and quick USB-C charging for unexpected tasks requiring focused illumination.
Recommended Products

4-TIER WATT 35% ENERGY SAVINGS - This LED linear high bay light four selectable wattages (400W/320W/240W/100W) cover full-scenario heights from 10-60FT with a single product line, eliminating the need for mixed-model purchases. This achieves a 'one product replaces multiple solutions' advantage—precisely matching wattage to installation height reduces energy consumption by over 35% and cuts maintenance time by 40%

【Super Bright】LED linear high bay light adopts high efficiency LED chip, the luminous efficacy is up to 150LM/W. Using only 300W power can emit 45000 lumens of high quality lights , with a daylight color temperature of 5000K.

⭐ IP66 WATERPROOF & DUSTPROOF — COMMERCIAL GRADE DURABILITY Built for the harshest environments with IP66-rated waterproof and dustproof construction. Durable polycarbonate housing reinforced with stainless steel hardware stands up to moisture, dust, and debris in car washes, parking garages, barns, warehouses, food processing facilities, walk-in coolers, carports, gas stations, and wet outdoor applications.
Dust Control Strategies for a Cleaner Workspace
Dust in woodworking can feel like a constant companion, right? But there are definitely ways to keep it in check. One simple trick is to set your table saw near the garage door. This way, you can let the sawdust just blow outside while you work.
Another effective step is to set up a dust collection system that connects directly to your tools. This pulls debris right at the source, and trust me, it makes a noticeable difference in air quality. You might also want to consider using floor vacuums with HEPA filters. These tidy up any leftover dust and debris, helping to keep your workspace organized.
Regular cleaning is key here. Have you ever thought about the dangers of sawdust build-up? It can create slip hazards and block ventilation—the last thing you want in your workspace. Make it a habit to keep things tidy.
Creating a designated dust control area is a solid idea, too. You can use barriers or curtains to contain the dust to one part of the garage while you’re working on projects. This minimizes the mess and keeps everything else clean.
Keeping your workspace dust-free might take a bit of effort, but it’s well worth it for your safety and comfort. Using drainage mats near entry points can also help prevent water and debris from creating slippery surfaces and reduce additional cleanup.
So, what are you waiting for? Start implementing some of these strategies today!
Recommended Products

Motor: 2 HP, 220V, 3450 RPM, 9A

Cyclone's two-stage separation provides more working CFM than comparable horsepower single-stage units

Durable Motor Design: Permanently-lubricated, totally-enclosed, fan-cooled motors are rated for continuous duty
Organizing Your Tools for Efficiency and Accessibility
Do you ever find yourself rummaging through a pile of tools, wasting precious time when you could be working on your project? Keeping a clean and organized workspace not only makes it safer but also lets you focus on what really matters—getting stuff done.
So, how do you optimize your setup? Start by organizing your tools based on their function. Hand tools? Hang ‘em on magnetic bars. Power tools? A few wall-mounted hooks will do the trick for quick access. Pegboards or slatwalls are a lifesaver for keeping commonly used tools within sight, which means you’ll spend less time searching and more time creating.
Don’t forget about labeling! Clearly marked storage bins and shelves will help maintain order, so you know where everything goes. When it comes to heavier tools, keep those down low for safety, and stash the lighter items up high.
Regularly checking your inventory is key, too. Take a moment every so often to declutter any tools you don’t use—it’s amazing how much space you can free up. Also, consider using durable tool bags to keep your frequently used tools organized and protected from damage and moisture.
Recommended Products

Specification: Garage storage system includes corner wall cabinet x 1, corner base cabinet x 1, wall cabinet x 2; 1-drawer cabinet x 2; 4-drawer cabinet x 1; workbench x 3, pegboard x 4. Item Weight: 302 lbs; Package Size: 55.1 x 36.2 x 75.6 in; Item Size: See Pictures; Item Color: Black and Grey The size of garage storage cabinet set are 130"L x19"Dx 76"H inches. Garage storage cabinets system includes Locker x2, Wall cabinet x2, 1-drawer roller cabinet x2, 4-drawer roller cabinet x1, 71 in workbench x1, Pegboard x10, Shelf to connect the wall cabinets x4.For stability, high cabinets can optionally be fixed to the wall. Overall weight capability 820 LBS.

Specification: Garage storage system includes corner wall cabinet x 1, corner base cabinet x 1, wall cabinet x 2; 1-drawer cabinet x 2; 4-drawer cabinet x 1; workbench x 3, pegboard x 4. Item Weight: 302 lbs; Package Size: 55.1 x 36.2 x 75.6 in; Item Size: See Pictures; Item Color: Black and Red. The size of garage storage cabinet set are 130"L x19"Dx 76"H inches. Garage storage cabinets system includes Locker x2, Wall cabinet x2, 1-drawer roller cabinet x2, 4-drawer roller cabinet x1, 71 in workbench x1, Pegboard x10, Shelf to connect the wall cabinets x4.For stability, high cabinets can optionally be fixed to the wall. Overall weight capability 820 LBS.

【PACKAGE INCLUDING】: 2 Sets of Blue HTC7218 with Power Socket Tool Cabinet! Adding a power outlet eliminates the need for an additional extension cord and provides easy access to power for the tool.
Frequently Asked Questions
How to Design a Workshop Layout?
To design an effective workshop layout, we should prioritize workbench placement, incorporate tool storage solutions, enhance workflow efficiency through logical zones, and implement safety measures with adequate lighting and shelving for organization.
What Are Common Mistakes in DIY Garage Builds?
Did you know 70% of DIY garage builds miss proper space planning? We often overlook safety protocols, tool placement, and effective storage solutions, leading to chaos and increased risks. Let’s avoid these common DIY mistakes together.
What Is a Good Size for a Small Workshop?
For a small workshop, ideal dimensions around 100 to 200 square feet guarantee effective space utilization. We’ve found ergonomic considerations, tool placement, and storage solutions are key to achieving a functional and comfortable working environment.
How to Organize a Garage Workshop?
“Organization is key to success.” We should prioritize workbench placement and tool storage, create safety zones, optimize space, and enhance workflow efficiency, ensuring everything’s accessible and our garage workshop remains tidy and effective for our projects.